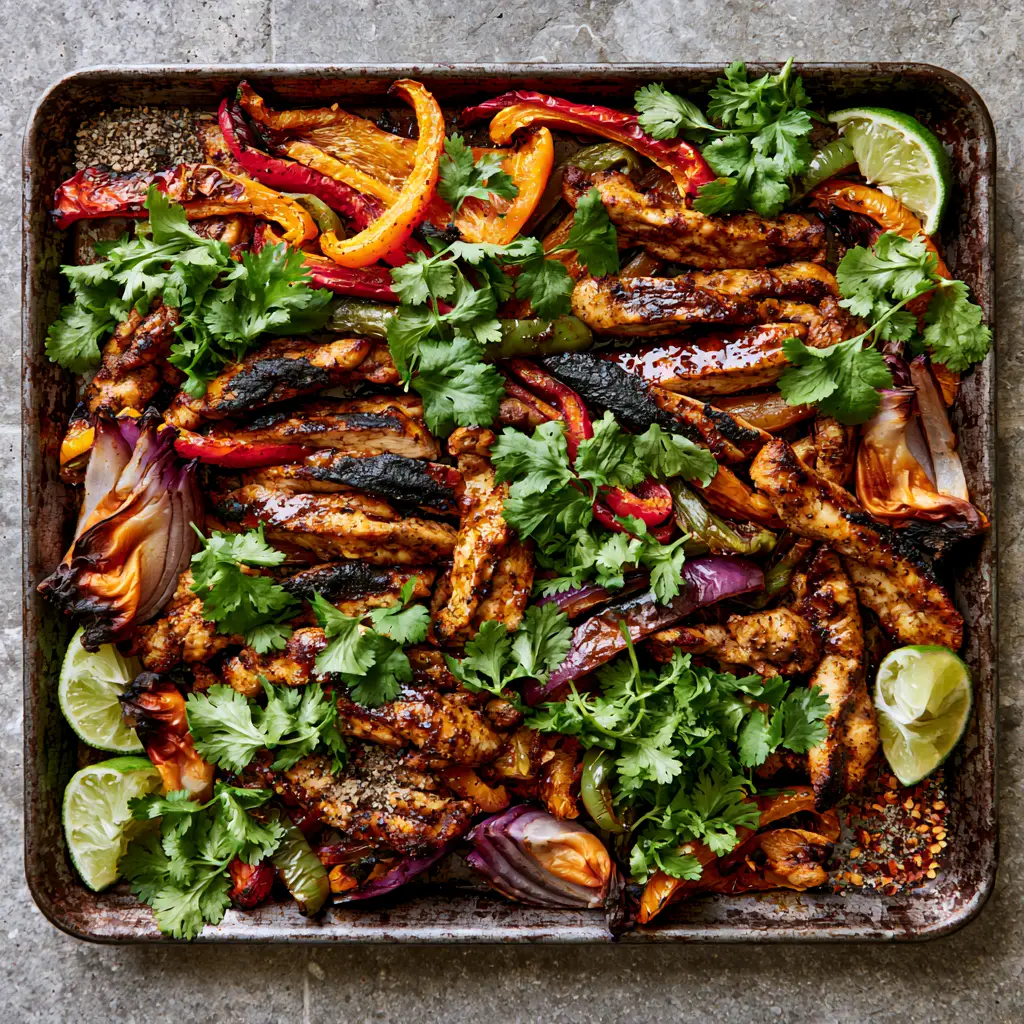
There is something inherently hypnotic about a rustic dark metal sheet pan emerging from a roaring oven, laden with Sheet Pan Chicken Fajitas that are still audibly sizzling. The aroma of charred poultry, sweet caramelized onions, and earth-shattering smoky paprika fills the kitchen, signaling that a restaurant-quality meal is ready in mere minutes. This isn’t just another weeknight recipe; it is a masterclass in high-heat roasting and texture management.
By utilizing the intense, dry heat of a specialized roasting environment, we transform humble chicken breast strips into juicy, glistening morsels with distinct dark charred edges. Every bite is a balance of the brightness from fresh lime wedges and the deep, resonant heat of red chili flakes and cracked black pepper. Whether you are an enthusiast home cook or a busy parent, this method ensures maximum flavor with minimal cleanup.
The visual appeal of this dish—with its vibrant, blistered slices of red, orange, and green bell peppers—is enough to stop any scroller in their tracks. It captures that authentic food blogger aesthetic while providing a nutritionally dense, high-protein meal that satisfies the deepest cravings for Tex-Mex comfort. Let’s dive into the culinary science of achieving that perfect blister and char.
Why You Will Crave These Vibrant Sheet Pan Fajitas
- Unmatched Texture: We achieve professional-grade blistering on the peppers and “burnt tips” on the red onion wedges by optimizing pan placement and temperature.
- The Glistening Glaze: A signature smoky paprika glaze ensures the chicken remains succulent while developing a deep, mahogany crust.
- Effortless Cleanup: By utilizing a single sheet pan, you spend less time at the sink and more time enjoying your lemonade moscato wine spritzer.
- Visual Masterpiece: The contrast of bright green fresh cilantro leaves against the dark metal pan makes this a centerpiece-worthy dinner.
- Customizable Heat: The balance of red chili flakes and cracked black pepper allows you to control the “zip” of every bite.
Essential Ingredients for the Perfect Glistening Fajita Glaze
Chicken Breast Strips: 1.5 lbs (680g) of boneless, skinless chicken breast, sliced into uniform 1/2-inch strips. Slicing against the grain is the secret to ensuring every piece remains tender even under high-heat charring.
The Bell Pepper Trio: 1 large red, 1 orange, and 1 green bell pepper (approx. 150g each). Using all three colors isn’t just for the visual “rainbow” effect; each color offers a slightly different level of sweetness and acidity when blistered.
Red Onion Wedges: 1 large red onion (200g), cut into thick wedges rather than rings. Wedges are structurally superior for roasting, allowing the exterior layers to caramelize into “burnt tips” while the interior stays soft and sweet.
Avocado Oil: 3 tbsp (45ml) of a high-smoke-point oil. Unlike olive oil, avocado oil can withstand the 425°F (220°C) temperatures required for blistering without breaking down or smoking excessively.
Smoked Paprika: 1 tbsp (7g) of high-quality pimentón. This provides the “smoky” backbone of the glaze and contributes to the deep, glistening red color of the chicken.
Lime Juice & Wedges: 2 large limes. The juice provides the acid needed to tenderize the meat in the glaze, while the wedges, nestled in the corners of the pan, soften and become extra juicy during roasting.
Red Chili Flakes & Black Pepper: 1 tsp (2g) of each. These are our “finishing” spices that provide the sharp, biting heat that cuts through the sweetness of the caramelized peppers.
Fresh Cilantro: 1/2 cup (15g) of loosely packed leaves. Added only at the very end, the fresh, citrusy notes of cilantro provide a necessary cooling element to the charred components.
Foundational Seasonings: 1 tsp (6g) sea salt, 1 tsp (3g) garlic powder, and 1/2 tsp (1g) cumin. These invisible ingredients build the savory floor that allows the smoky paprika to truly shine.
The Best Professional Tools for Sheet Pan Success
To achieve the “rustic dark metal” look and the perfect sear described in our visual blueprint, your equipment matters. A heavy-duty, rimmed half-sheet pan is non-negotiable; thin pans will warp at high temperatures and distribute heat unevenly, leading to steaming rather than roasting.
A dark-colored or well-seasoned carbon steel pan is actually preferable here, as dark surfaces absorb more heat, resulting in better charring on the bottom of the chicken strips. You will also need a sharp chef’s knife for precise vegetable slicing and a large mixing bowl to ensure every strip and slice is perfectly coated in the smoky glaze before hitting the pan.
Master the Art of the Perfect Sizzle: Step-by-Step Instructions
Phase 1: Prepping the Rainbow of Peppers and Onion Wedges
Start by preheating your oven to 425°F (220°C). While the oven reaches temperature, prepare your vegetables. Core the red, orange, and green bell peppers and slice them into long, 1/4-inch strips.
For the red onion, remove the papery skin but leave the root end slightly intact as you cut it into 8 thick wedges. This technique ensures the wedges don’t fall apart immediately, allowing those “soft, burnt tips” to develop while the center remains succulent. If you enjoy the ease of these veggies, you might also like my grilled veggie skewers.
Phase 2: Crafting the Signature Smoky Paprika Glaze
In a small glass jar or bowl, whisk together the avocado oil, lime juice, smoked paprika, garlic powder, cumin, sea salt, and half of the red chili flakes. The mixture should be thick and vibrant red.
Place your chicken breast strips, peppers, and onion wedges into a large bowl. Pour the glaze over the top and use your hands (or tongs) to massage the marinade into every crevice. You want the chicken to look “glistening”—this is the fat and sugar content that will eventually caramelize into those dark charred edges we are looking for.
Phase 3: Achieving the Perfect Char and Blister
Spread the mixture onto your dark metal sheet pan in a single, even layer. Do not overcrowd the pan! If the ingredients are piled on top of each other, they will release moisture and steam, resulting in grey meat rather than charred edges. Use two pans if necessary.
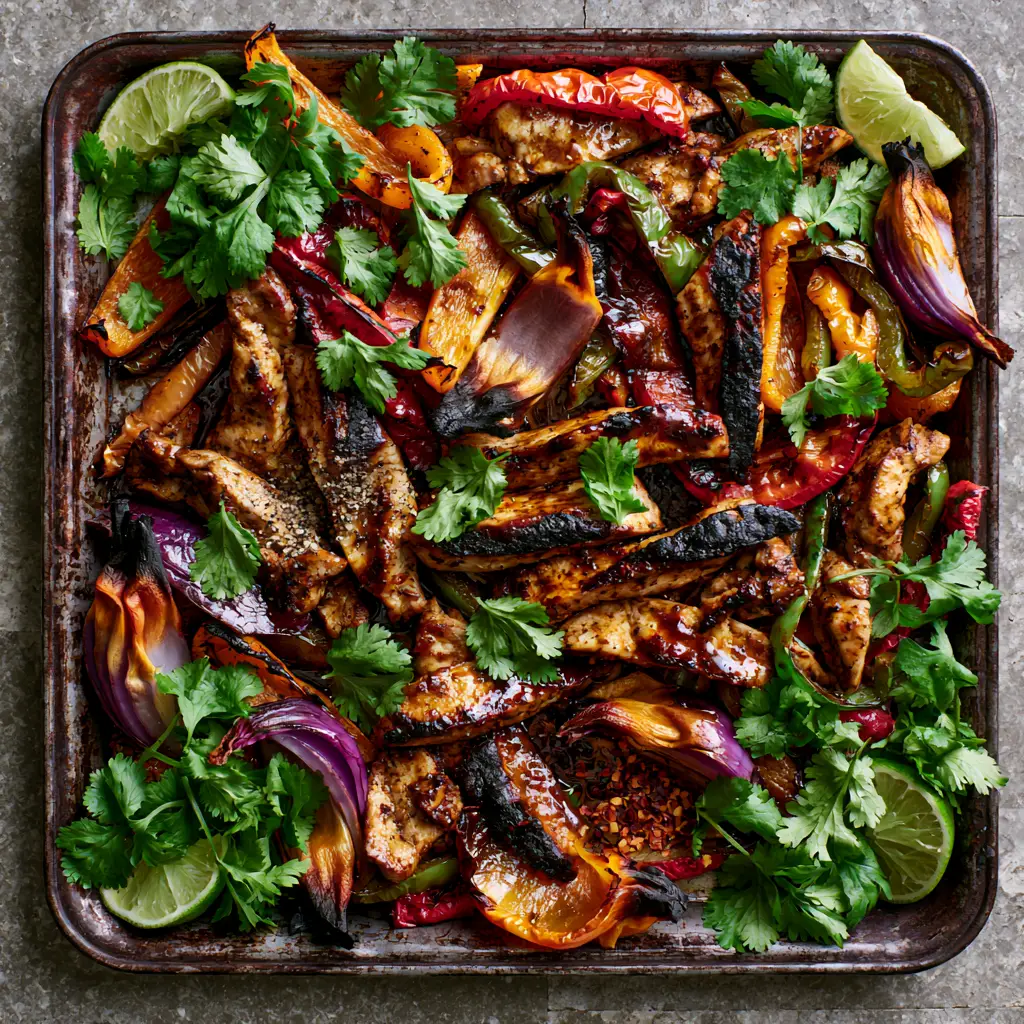
Roast for 18–22 minutes. At the 15-minute mark, toss the ingredients quickly and nestle the lime wedges into the corners of the pan. Look for the visual cues: the peppers should have black “blister” marks, and the chicken should have visible dark, crispy edges. The onions should be translucent with dark, curled tips.
Phase 4: The Final Garnish and Presentation
Once removed from the oven, the pan should be sizzling loudly. Immediately dust the entire pan with the remaining red chili flakes and a generous amount of freshly cracked black pepper. This “blooms” the spices in the hot oil remaining on the pan.
Scatter the fresh bright green cilantro leaves generously across the top. The heat from the pan will slightly wilt the bottom of the leaves, releasing their essential oils. Serve directly from the pan for that authentic, rustic aesthetic.
Expert Culinary Secrets for Restaurant-Quality Results
- The “Dry” Secret: Pat your chicken and peppers completely dry with paper towels before adding the glaze. Excess water is the enemy of the “blister.”
- High Rack Placement: Position your oven rack in the top third of the oven. This brings the Sheet Pan Chicken Fajitas closer to the heating element, encouraging faster charring before the chicken can overcook.
- Don’t Skip the Acid: The lime juice in the glaze isn’t just for flavor; it breaks down the protein fibers in the chicken breast, ensuring it stays juicy at 425°F.
- The Sheet Pan Material: If you only have a shiny aluminum pan, you may need to broil the fajitas for the final 2 minutes to achieve the dark charred edges.
How to Store and Reheat Your Sheet Pan Fajitas
These fajitas make an incredible base for meal prep. Store leftovers in an airtight container in the refrigerator for up to 4 days. The flavors of the smoky paprika actually deepen as the dish sits.
To reheat, avoid the microwave if possible, as it will make the peppers mushy. Instead, toss them back onto a sheet pan and flash-fry them under the broiler for 3–5 minutes. This restores the “sizzle” and keeps the chicken from becoming rubbery. If you find yourself with extra chicken, it works perfectly in a Mexican chicken casserole the next day.
Creative Pairing Ideas to Complete Your Mexican Feast
While these Sheet Pan Chicken Fajitas are a powerhouse on their own, they pair beautifully with various sides. Serve them with warm flour tortillas, a side of Mexican street corn, or a light cucumber onion tomato salad to provide a crisp contrast to the smoky charred flavors.
For those looking for a lower-carb option, these fajitas are excellent served over a bed of cilantro-lime cauliflower rice. If you are feeding a crowd, you can also serve these alongside chicken fried rice for a fusion-style dinner party that offers something for everyone.
Your Questions Answered: Fajita Troubleshooting
Yes! Chicken thighs are more forgiving and remain very juicy. Just be sure to trim excess fat and increase the roasting time by 3-5 minutes to ensure the skinless thighs reach an internal temperature of 165°F (74°C).
Preheat your sheet pan in the oven for 10 minutes before adding the ingredients. When the glazed chicken and vegetables hit the hot metal, they will immediately begin to sear and sizzle just like at a steakhouse.
The most common cause of sogginess is overcrowding. Ensure your ingredients are in a single layer with space between them so air can circulate. If the pan is too crowded, the moisture released will steam the food instead of roasting it.
While not strictly necessary, dark pans absorb heat more efficiently than shiny aluminum ones, which leads to better browning and more distinct charred edges on your chicken and onions.
A high temperature of 425°F (220°C) is ideal. This allows the exterior of the peppers to blister and the chicken to develop charred edges before the centers overcook and become dry.
The Ultimate Sheet Pan Chicken Fajitas Recipe Card
Sheet Pan Chicken Fajitas: The Ultimate Smoky One-Pan Dinner
Ingredients
Equipment
Method
- Preheat oven to 425°F (220°C). Slice chicken against the grain and cut all peppers into strips and onions into wedges.
- Whisk oil, lime juice, and spices in a bowl. Toss chicken and vegetables in the glaze until glistening and fully coated.
- Spread in a single layer on a dark metal sheet pan. Roast for 18-22 minutes until peppers are blistered and chicken has charred edges.
- Nestle lime wedges in the pan for the last 5 minutes. Remove and garnish with cilantro, black pepper, and extra chili flakes.
Notes
Use a dark pan for the best caramelization results.
Closing & Call to Action
Sheet Pan Chicken Fajitas are the ultimate solution for anyone who refuses to sacrifice flavor for convenience. The combination of blistered peppers, charred chicken, and that glistening smoky glaze creates a sensory experience that is as beautiful as it is delicious. This recipe proves that with the right technique and a very hot oven, you can create magic on a single tray.
If you enjoyed this recipe, please leave a comment below and let me know how your char turned out! Don’t forget to sign up for our newsletter for more one-pan wonders and follow me on Pinterest to save this for your next Taco Tuesday. Happy roasting!