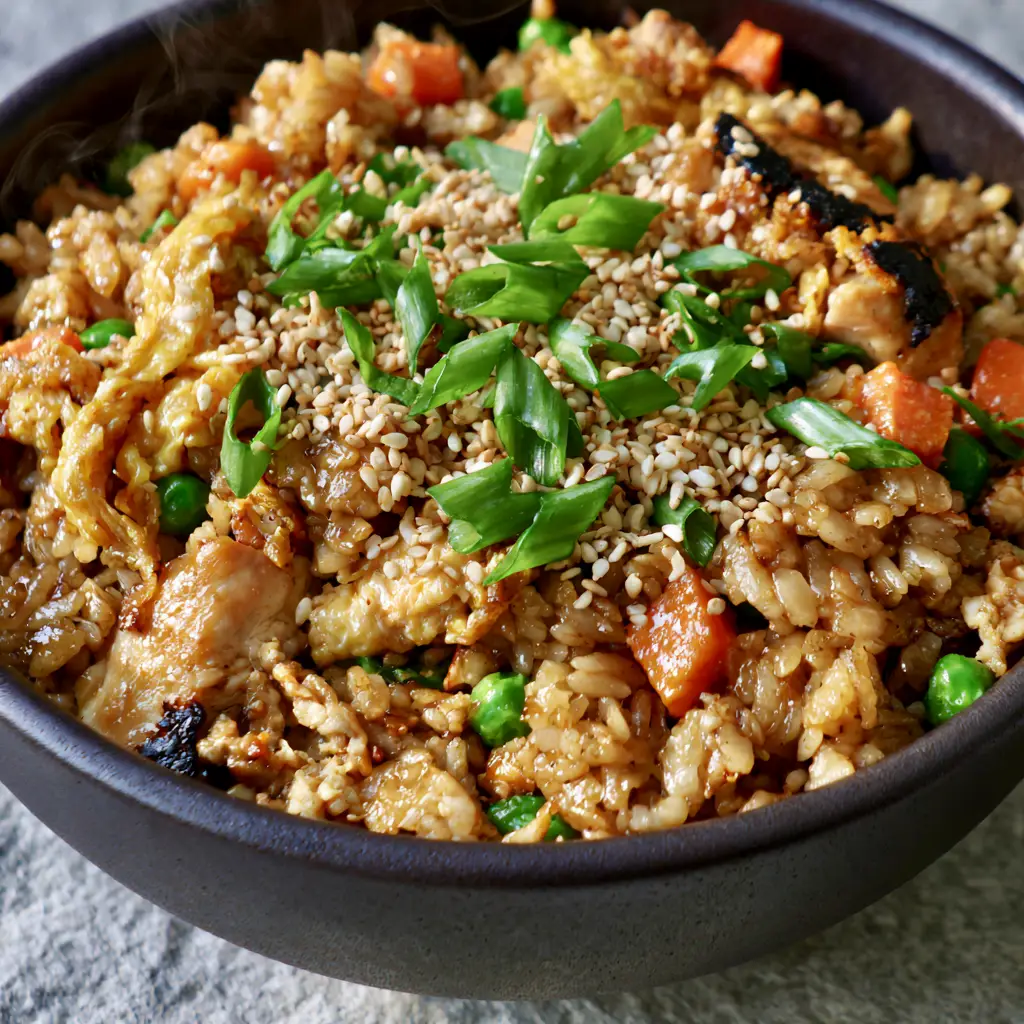
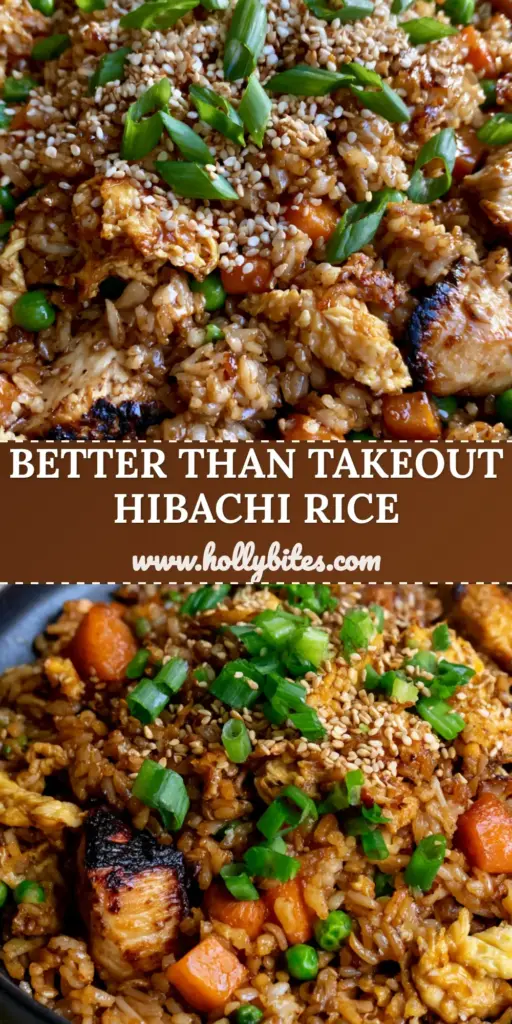
There is nothing quite like the sensory experience of authentic, restaurant-quality chicken fried rice. Imagine a shallow, dark matte ceramic bowl filled with individual, distinct grains of golden-brown jasmine rice, each one glistening under a light, savory glaze. This isn’t just a side dish; it is a masterclass in texture and temperature, featuring large chunks of chicken breast with dark seared edges and vibrant vegetables.
When you prepare this chicken fried rice at home, you are looking for that specific “hibachi” finish. The soft natural daylight hitting your plate should highlight an oily sheen and crispy textures that tell you exactly how much flavor is packed into every bite. With tiny wisps of steam rising from the bowl, this recipe brings the high-heat energy of a Japanese steakhouse directly to your kitchen.
Whether you are looking to replicate a favorite takeout memory or simply want a nutritious, protein-packed meal, this version stands out because of its forensic attention to detail. We are focusing on the contrast between the fluffy ribbons of golden scrambled eggs and the crunch of toasted white sesame seeds, all brought together by a glossy soy ginger glaze.
Why This Hibachi Chicken Fried Rice Beats Takeout Every Time
- Distinct Grain Architecture: By using specific cooling techniques, we ensure every grain of jasmine rice remains separate and toasted, never mushy or clumped.
- Professional Maillard Reaction: We achieve those signature dark seared edges on the chicken breast cubes, providing a smoky depth that mimics a commercial flat-top grill.
- Glossy Soy Ginger Finish: Our signature glaze isn’t just salty; it’s a balanced reduction of aromatics that coats the rice without making it soggy.
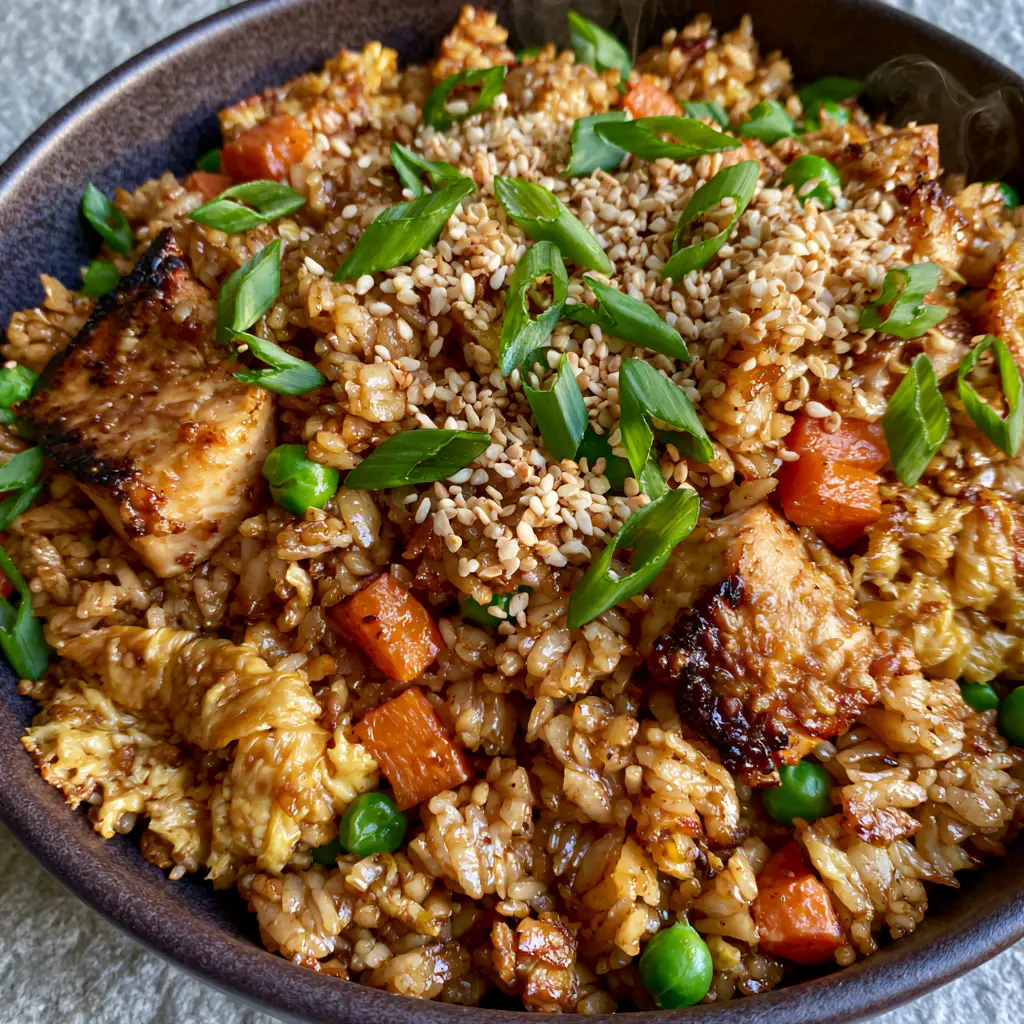
- Vibrant Visual Contrast: The combination of bright orange diced carrots, emerald green peas, and freshly sliced scallions creates a plate that looks as good as it tastes.
- Textural Harmony: From the snap of the sesame seeds to the creamy ribbons of egg, every forkful offers a different sensory cue.
The Anatomy of the Perfect Grain: Ingredients and Substitutions
Jasmine Rice: You will need 4 cups (600g) of cooked jasmine rice. For the best chicken fried rice, it must be day-old and chilled; fresh rice contains too much moisture, which leads to steaming rather than frying. If you’re in a rush, spread freshly cooked rice on a sheet pan and freeze it for 20 minutes to dry the surface starch.
Chicken Breast: Use 1 lb (450g) of boneless, skinless chicken breast, cut into 3/4-inch (2cm) cubes. This size ensures the chicken stays juicy inside while the outside achieves a golden-brown crust. You can substitute with chicken thighs if you prefer a higher fat content and more forgiving texture.
The Glossy Soy Ginger Glaze: This is a blend of 3 tbsp (45ml) low-sodium soy sauce, 1 tbsp (15g) freshly grated ginger, and 1 tsp (5g) honey. The ginger provides a sharp brightness, while the honey helps the sauce caramelize onto the grains, creating that “glistening” effect seen in professional food photography.
Foundational Aromatics: You will need 3 cloves of minced garlic and 2 tbsp (28g) of unsalted butter. While many recipes use only oil, the butter is the “secret” hibachi ingredient that provides that rich, nutty back-note characteristic of teppanyaki cooking.
Vegetable Medley: 1/2 cup (75g) of finely diced carrots and 1/2 cup (75g) of frozen petite peas. These are classic staples that provide sweetness and a “pop” of texture against the savory rice. If you are looking for a lower-carb accompaniment, consider pairing this with charred vegetable skewers.
Egg Ribbons: 3 large eggs, lightly beaten with a pinch of salt. Cooking them separately and folding them in at the end ensures you get those beautiful “fluffy ribbons” rather than tiny, invisible bits of egg scrambled into the rice.
Finishing Garnishes: A generous dusting of 1 tbsp (9g) toasted white sesame seeds and 1/4 cup (25g) finely sliced fresh scallions. These add the final layer of “bright green” freshness and “nutty” crunch that completes the visual blueprint.
Essential Equipment for High-Heat Frying
To achieve the “distinct grains” and “seared edges” described in our visual prompt, a standard non-stick skillet often falls short. I recommend a heavy-bottomed carbon steel wok or a large 12-inch (30cm) cast-iron skillet. These materials retain heat exceptionally well, allowing for the rapid evaporation of moisture which is critical for frying.
You will also need a long-handled metal spatula (or “chuan”) to toss the ingredients without breaking the rice grains. A microplane is essential for grating the fresh ginger into a fine paste, ensuring the flavor is distributed evenly throughout the glossy glaze without any woody chunks.
Mastering the Golden Sear: Step-by-Step Instructions
Phase 1: Preparing the Protein Foundation
Pat the chicken breast cubes dry with a paper towel; moisture is the enemy of a good sear. Season the chicken generously with cracked black pepper and a pinch of salt. Heat 1 tbsp (15ml) of high-smoke-point oil (like avocado or canola oil) in your wok over medium-high heat until it just begins to shimmer.
Add the chicken in a single layer, leaving space between the cubes. Do not stir them for at least 2 minutes. You are looking for a deep, dark golden-brown crust to form on the bottom. Once seared, toss them quickly to brown the other sides, then remove them from the pan. They should be just barely cooked through, as they will return to the pan later.
Phase 2: Sautéing the Aromatics and Vegetables
In the same pan, add the butter. As it foams, add the diced carrots. Sauté for 3-4 minutes until they are tender but still have a slight “snap.” Add the minced garlic and grated ginger, stirring constantly for 30 seconds until the aroma fills the kitchen. Be careful not to burn the garlic, as it will turn bitter.
If you enjoy a more complex flavor profile, you might find similarities in the aromatics used for Japanese BBQ chicken fried rice, which often incorporates similar heat levels. Add the frozen peas at the very end of this phase, just to take the chill off.
Phase 3: The Art of the Fried Grain
Increase the heat to high and add the remaining 1 tbsp (15ml) of oil. Crumble the cold jasmine rice into the pan, breaking up any large clumps with your hands as you go. Use the spatula to press the rice against the hot surface of the wok. Listen for the “crackle”—this is the sound of the rice actually frying.
Pour the soy sauce and honey mixture over the rice. Toss vigorously to ensure every grain is coated in the glossy glaze. The rice should transform from white to a beautiful, uniform golden-brown. Keep the rice moving to prevent sticking, but allow it to sit for 15-20 seconds between tosses to develop those “crispy textures.”
Phase 4: Creating the Egg Ribbons and Final Assembly
Push the rice to one side of the wok. Pour the beaten eggs into the cleared space. Let them set for 10 seconds, then gently swirl them with the spatula to create large, soft curds. Before they are fully dry, fold them back into the rice. This technique creates the “golden scrambled egg ribbons” we desire.
Return the seared chicken and any accumulated juices to the wok. Add the cracked black pepper and half of the scallions. Give everything one final, high-heat toss for 60 seconds to marry the flavors. The chicken should be glistening and the steam should be rising prominently from the pan.
Expert Tips for Success
- The “Cold Rice” Rule: Never use warm rice. If the rice is warm, the starch is still active and sticky, which will result in a gummy mess rather than distinct grains.
- High Heat is Mandatory: If your stove isn’t hot enough, the vegetables will bleed water and the rice will steam. Cook in batches if your pan isn’t large enough to maintain a high temperature.
- The Butter Finish: Adding a small pat of butter at the very end (the “Hibachi Flip”) adds a professional sheen and a rich mouthfeel that oil alone cannot provide.
- Rinse Your Rice: Before cooking the rice (the day before), rinse it until the water runs clear. Removing excess surface starch is the first step toward non-sticky chicken fried rice.
What to Serve With Hibachi Fried Rice
This dish is a complete meal on its own, but it pairs beautifully with other Asian-inspired sides. For a light contrast, a chilled cucumber salad offers a vinegary brightness that cuts through the savory soy glaze. If you want to lean into the Pacific island vibe, try serving it alongside a scoop of creamy Hawaiian mac salad.
For those hosting a larger dinner party, this fried rice serves as an excellent base for Thai-style pork skewers, providing a sweet and salty balance to the meal.
Storage, Reheating & Freezing
Refrigeration: Store leftovers in an airtight container for up to 3 days. Fried rice actually holds up remarkably well and is a favorite for meal prepping.
Reheating: For the best results, reheat in a skillet over medium heat with a splash of water or a tiny bit of oil to restore the “glistening” texture. Avoid the microwave if possible, as it can make the chicken rubbery.
Freezing: You can freeze chicken fried rice for up to 2 months. Thaw it overnight in the refrigerator before reheating it in a hot pan.
Common Questions About Chicken Fried Rice
It is not recommended. Fresh rice is too moist and will clump together. For distinct grains, use day-old chilled rice or spread fresh rice on a tray and freeze it for 20 minutes to dry it out.
Pat the chicken dry before cooking and ensure your pan is very hot. Let the chicken sit undisturbed for 2 minutes to allow the Maillard reaction to create a deep crust.
The secret is using unsalted butter along with a high-smoke-point oil. The butter provides a rich, nutty flavor and a professional glossy sheen that oil alone cannot replicate.
Use a neutral oil with a high smoke point, such as canola, vegetable, or avocado oil. Avoid extra virgin olive oil as it will burn at the temperatures required for a good sear.
Mushiness usually comes from two things: using warm/fresh rice or crowding the pan. If the pan temperature drops, the ingredients steam rather than fry. Cook in batches if necessary.
How to Make the Best Chicken Fried Rice
Chicken Fried Rice: The Ultimate Hibachi-Style Recipe with Soy Ginger Glaze
Ingredients
Equipment
Method
- Heat 1 tbsp oil in a wok. Add chicken breast cubes and sear until dark golden-brown edges form (about 2-3 mins). Remove and set aside.
- Add butter to the pan. Sauté carrots for 3 mins. Add garlic and ginger, cooking for 30 seconds until fragrant.
- Add remaining oil and increase heat to high. Add cold jasmine rice, pressing into the pan to crisp. Pour in soy sauce and honey mixture, tossing to coat grains in a glossy glaze.
- Push rice aside, cook eggs into soft ribbons, then fold back into the rice. Add peas, seared chicken, and scallions. Toss one last time and garnish with sesame seeds.
Notes
A carbon steel wok provides the best 'wok hei' or breath of the wok for that smoky flavor.
Closing & Call to Action
Mastering chicken fried rice is a rite of passage for any home cook who loves the bold, savory flavors of Hibachi cooking. By focusing on the “Visual Recipe Blueprint”—from the golden-brown jasmine grains to the dark seared chicken cubes—you can create a dish that is as beautiful as it is delicious. The combination of fresh ginger, garlic, and that glossy soy glaze ensures a restaurant-quality result every time.
Did you achieve the perfect sear on your chicken? Let me know in the comments below! If you enjoyed this recipe, please share it on Pinterest so others can enjoy it too. Don’t forget to sign up for our newsletter for more elite culinary guides and technical kitchen tips.