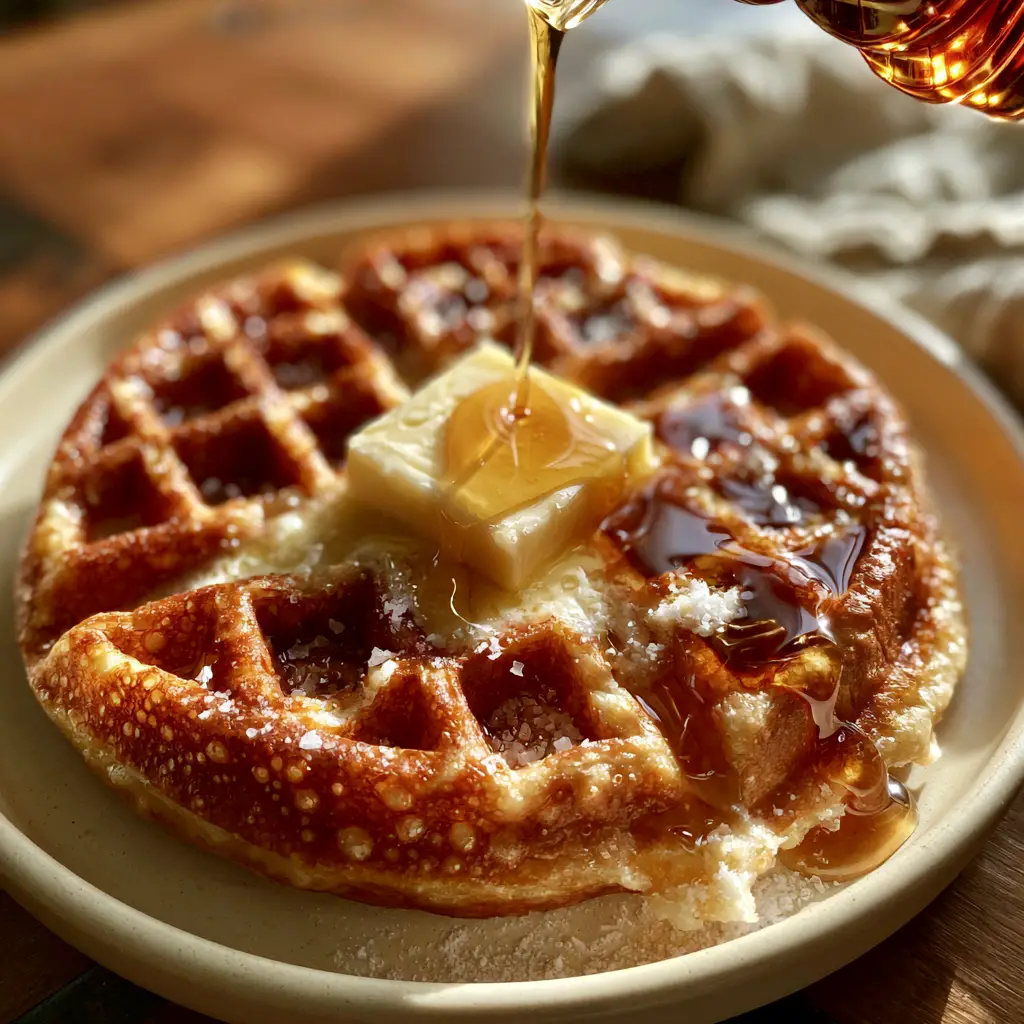
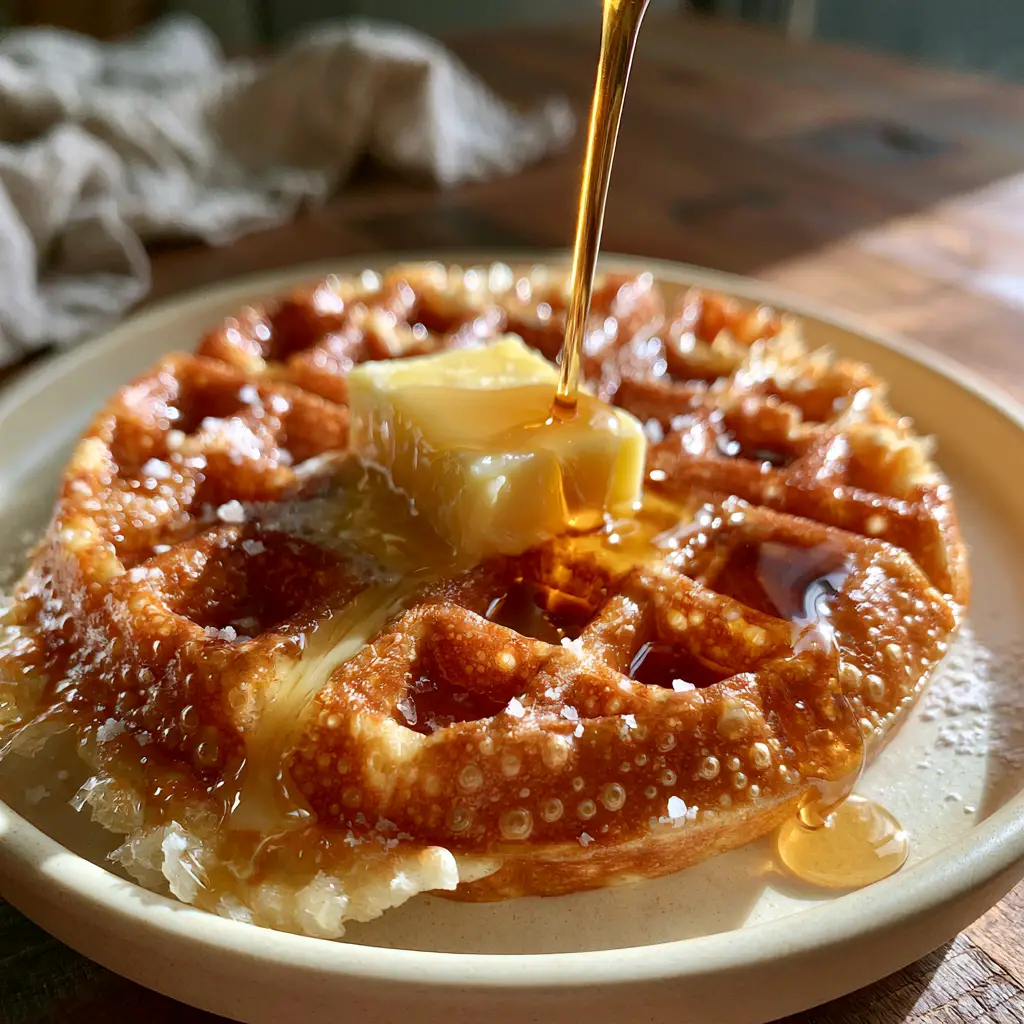
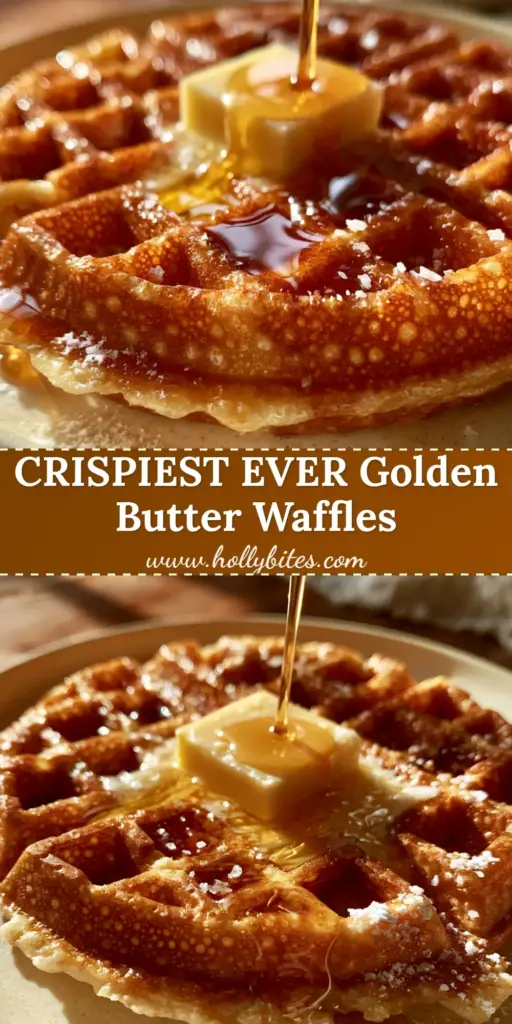
There is a specific, fleeting moment of breakfast perfection where a waffle transcends being mere food and becomes a sensory experience. These golden butter waffles are the embodiment of that moment, featuring a deep, vibrant golden-brown hue that suggests a level of crunch usually reserved for high-end pastry. If you have been searching for a waffle that doesn’t go limp the second the syrup hits the plate, you have found your holy grail.
Inspired by the “shattered-glass” texture of authentic Belgian street waffles, this recipe focuses on a high-aeration batter and a precise fat-to-flour ratio. The result is a thick, stately waffle with micro-bubbles dancing across the surface and deep wells designed to hold reservoirs of molten butter and amber syrup. It is a handheld masterpiece of culinary engineering, designed for the home cook who demands professional results.
Whether you are hosting a festive brunch or simply indulging in a slow Sunday morning, these golden butter waffles provide the perfect canvas for a dusting of snow-white powdered sugar and a pinch of flaky sea salt. Every bite offers a contrast between the architectural crispness of the ridges and the cloud-like, steaming interior that defines the best Belgian-style bakes.
Why These Golden Butter Waffles Redefine Breakfast Excellence
- The Shattered-Glass Ridge: By incorporating cornstarch and carbonation, we achieve an exterior so crispy it literally crackles when pressed with a fork.
- Symphonic Texture Contrast: While the outside is a deep golden-brown, the inside remains a fluffy, aerated sanctuary of sweetness and steam.
- The Butter-Well Design: These waffles are structurally reinforced to support a thick slab of melting salted butter without losing their structural integrity.
- Visual Masterpiece: From the glistening amber syrup trails to the fine dusting of powdered sugar, these waffles are as beautiful as they are delicious.
The Essential Science Behind the Shattered-Glass Crunch
To achieve the visual and textural benchmarks of our golden butter waffles, every ingredient serves a dual purpose of flavor and physics. We aren’t just making a batter; we are building a structural lattice that can withstand the heat of the iron and the weight of the toppings.
All-Purpose Flour: 2 cups (250g). This provides the necessary protein structure to hold the “micro-bubbles” seen in the high-end photography without becoming tough or bread-like.
Cornstarch: 1/2 cup (64g). The secret to that “shattered-glass” texture; it interferes with gluten development, ensuring the ridges stay crisp even after being doused in syrup.
Granulated Sugar: 2 tbsp (25g). Beyond sweetness, sugar aids in the Maillard reaction, creating that deep, vibrant golden-brown color described in our visual blueprint.
Baking Powder & Baking Soda: 1 tbsp (12g) and 1/2 tsp (3g). This dual-leavening approach creates the extreme aeration and the “fluffy aerated center” required for a true Belgian profile.
Flaky Sea Salt: 1/2 tsp (3g) for the batter, plus more for finishing. This enhances the “golden liquid” butter trails by providing a sharp, savory counterpoint to the amber maple syrup.
Buttermilk: 1 1/2 cups (360ml). The acidity reacts with the baking soda to create those gorgeous micro-bubbles visible on the waffle’s surface.
Unsalted Butter (Melted): 1/2 cup (115g). The high fat content ensures the interior remains moist while the exterior sears to a crispy finish in the iron.
Large Eggs (Separated): 2 units. We will beat the whites to stiff peaks, a traditional technique that guarantees the “cloud-like” center mentioned in the culinary forensics.
Vanilla Bean Paste: 1 tsp (5ml). Using paste instead of extract provides those tiny black specks of flavor that signal a high-end, artisanal breakfast experience.
Club Soda (Room Temp): 1/2 cup (120ml). The final secret for the lightest waffles; the carbonation provides an extra boost of lift for maximum height.
Kitchen Tools for the Perfect Belgian Profile
To achieve the deep wells and thick structure of these golden butter waffles, equipment choice is paramount. A standard thin waffle iron will not produce the same “deep square wells” seen in our visual prompt.
You will need a Belgian Waffle Maker with deep grids to allow the batter to expand vertically. A High-Speed Hand Mixer is essential for whipping the egg whites to the stiff peaks required for aeration. Finally, use a Wire Cooling Rack; never stack hot waffles on a plate, as the steam will immediately destroy the shattered-glass texture you worked so hard to create.
Mastering the Golden Batter: A Step-by-Step Guide
Phase 1: The Dry Structural Foundation
In a large mixing bowl, whisk together the flour, cornstarch, sugar, baking powder, baking soda, and salt. Ensure there are no clumps of cornstarch, as these will prevent the even browning of the waffle ridges. This dry mix creates the “skeletal” structure of your golden butter waffles.
Phase 2: The Emulsified Liquid Core
In a separate medium bowl, whisk the buttermilk, melted (and slightly cooled) butter, egg yolks, and vanilla bean paste until completely smooth. Slowly pour this into the dry ingredients, stirring with a rubber spatula until just combined. The batter should be thick but pourable; do not overmix, or you will develop too much gluten.
Phase 3: The Aeration Secret
In a clean glass bowl, beat the egg whites until stiff, glossy peaks form. Gently fold the egg whites and the club soda into the batter. You should see “micro-bubbles” forming instantly—this is the sound of a crispy waffle in the making. Let the batter rest for 5-10 minutes while your iron preheats to its highest setting.
Phase 4: The High-Heat Sear
Grease your waffle iron lightly with a high-smoke-point oil. Pour the batter into the center, allowing it to spread nearly to the edges. Close the lid and cook until the steam stops escaping the sides—this is the visual cue that the moisture has evaporated and the “shattered-glass” crust has formed. The final result should be a deep, vibrant golden-brown.
Chef Secrets for Waffle House Superiority
- The Temperature Gap: Ensure your buttermilk and eggs are at room temperature. Cold ingredients will cause the melted butter to seize, creating clumps in the batter rather than a smooth emulsion.
- The Resting Period: Allowing the batter to rest for 10 minutes lets the starch granules hydrate, which leads to a more uniform “deep golden” color during the bake.
- Don’t Peek: Opening the waffle iron too early can tear the delicate aerated center before it has set. Wait for the steam to subside entirely.
- The Salted Finish: The “pinch of flaky sea salt” isn’t just for looks; it cuts through the sugar and heightens the flavor of the maple syrup.
Make-Ahead Magic: Preserving that Golden Crisp
If you are making a large batch of these golden butter waffles, preheat your oven to 200°F (95°C). Place a wire rack on a baking sheet and transfer finished waffles directly to the rack. This allows air to circulate around the entire waffle, preventing the bottom from becoming soggy while you finish the rest of the batter.
For freezing, allow the waffles to cool completely on a rack. Wrap them individually in plastic wrap and store in a freezer bag for up to 3 months. To reheat, simply pop them in a toaster or a 350°F (175°C) oven until the exterior regains its shattered-glass texture. Avoid the microwave, as it will turn your crispy masterpiece into a sponge.
Elevating Your Morning Spread
While these golden butter waffles are the star of the show, they pair beautifully with other breakfast staples. If you’re looking for a slightly tangier twist on this classic, try our protein-packed yogurt waffles. For those who prefer a more delicate, European-style morning, these classic French crepes offer a beautiful textural contrast.
If you are serving these as part of a larger brunch buffet, consider adding a savory element like hearty breakfast roll-ups or a batch of tender lemon ricotta muffins for a burst of citrus. For a lighter, vegetable-forward side, these creamy spinach and eggs provide the perfect savory balance to the sweet maple syrup.
Frequently Asked Questions
You can, but the texture will be less airy. Buttermilk reacts with baking soda to create micro-bubbles. If using regular milk, add a teaspoon of lemon juice to mimic the acidity.
Yes! Whipping the whites is the difference between a dense waffle and a true ‘fluffy aerated’ Belgian center. It provides the structural lift that makes these waffles elite.
The deep color comes from the Maillard reaction, aided by the sugar in the batter and a high-heat setting on your waffle iron. Don’t be afraid to let them cook a minute longer than the ‘ready’ light suggests.
Place a wire cooling rack on a baking sheet in a 200°F (95°C) oven. The rack allows air to circulate, keeping the waffles crispy rather than steaming them on a flat plate.
Soft waffles usually result from too much moisture or not enough heat. Ensure you use cornstarch in the batter and wait until the steam completely stops escaping the iron before opening it.
The Ultimate Golden Butter Waffle Recipe
Golden Butter Waffles: The Ultimate Crispy Belgian Recipe
Ingredients
Equipment
Method
- In a large bowl, whisk flour, cornstarch, sugar, baking powder, baking soda, and salt until aerated.
- In a separate bowl, whisk buttermilk, melted butter, egg yolks, and vanilla. Fold into dry ingredients.
- Beat egg whites until stiff peaks form. Fold whites and club soda gently into the batter until micro-bubbles appear.
- Pour batter into a hot Belgian waffle iron. Cook until a deep golden-brown crust forms and steam stops escaping.
- Serve immediately with a slab of salted butter, a pour of amber syrup, and a dusting of powdered sugar.
Notes
For maximum crunch, cool waffles on a wire rack rather than a flat plate.
Closing & Call to Action
There is nothing quite like the first bite of a perfectly executed golden butter waffle—the way the crispy ridges give way to a soft, steaming center, all coated in the richness of melting salted butter. This recipe is designed to bring that high-end restaurant experience directly to your kitchen table. We would love to see your breakfast creations! If you make these, please leave a comment below and share your photos with us. Don’t forget to follow us and save this recipe to your breakfast boards on Pinterest for your next morning feast!