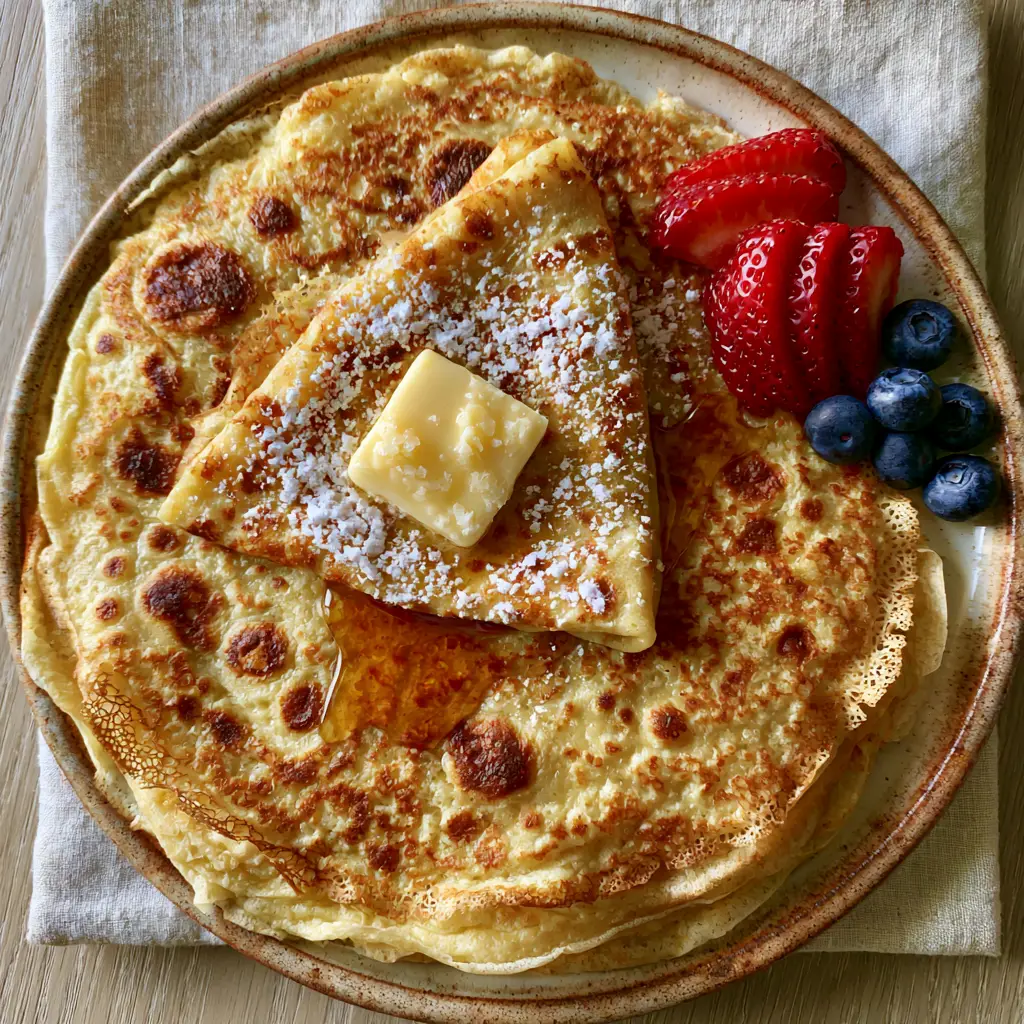
There is a specific, quiet magic in a stack of authentic French crepes catching the soft, natural morning sunlight. Imagine ten paper-thin layers piled high on a rustic ceramic plate, each featuring beautiful golden-brown mottled leopard spotting and delicate lacy edges that shatter slightly at the touch of a fork.
This recipe isn’t just about mixing flour and eggs; it is a culinary masterclass in achieving that hyper-realistic food photography look in your own kitchen. We are recreating the exact visual of a melting salted butter pat slowly cascading over a dusting of fine powdered sugar, accented by vibrant red sliced strawberries and fresh blueberries.
Whether you are a seasoned chef or a home cook looking to elevate your brunch game, mastering the French crepes technique is a foundational skill. By the end of this guide, you will be drizzling translucent amber maple syrup over a stack that looks like it stepped right off a professional food stylist’s set.
The Anatomy of a Perfect Crepe: Why This Recipe Works
- The Paper-Thin Texture: We use a specific hydration ratio to ensure the batter spreads instantly, creating a lacy, translucent finish rather than a thick pancake.
- Authentic Leopard Spotting: Through precise pan temperature management and the use of browned salted butter, we achieve those iconic dark-gold “mottled” marks.
- Elasticity and Strength: By resting the batter, we allow the gluten to relax, ensuring your French crepes can be artfully folded without tearing or cracking.
- The Visual Finish: Every ingredient, from the fine powdered sugar to the glistening maple syrup, is chosen for both flavor and aesthetic brilliance.
Essential Pantry Staples for Authentic French crepes
To achieve the visual result described in our blueprint, every ingredient must serve a dual purpose: structural integrity and sensory appeal. We don’t just use butter; we use salted butter to create a flavor contrast that highlights the sweetness of the berries.
All-Purpose Flour: 1 cup (125g). This provides the necessary protein structure. Too much makes them chewy; just enough makes them delicate and “paper-thin.”
Whole Milk: 1 ½ cups (360ml). The fat content in whole milk is crucial for that tender mouthfeel and the lacy edges that crisp up beautifully against the heat.
Large Eggs: 2 eggs (approx. 100g). Eggs act as the primary binder. They provide the golden hue and the “lift” that allows the batter to set quickly once it hits the pan.
Melted Salted Butter: 2 tbsp (28g) for the batter, plus more for the pan. Salted butter is the secret to those “leopard spots.” The milk solids in the butter caramelize faster, creating the mottled look.
Granulated Sugar: 1 tbsp (12g). A tiny amount of sugar isn’t just for sweetness; it aids in the Maillard reaction, ensuring those golden-brown spots develop before the crepe dries out.
Vanilla Extract: 1 tsp (5ml). This provides the “aromatic” cue. As the crepe cooks, the scent of vanilla and toasted butter will signal that the flip is near.
The “Invisible” Foundations: A pinch of fine sea salt and 2 tablespoons of water. The water thins the protein in the milk, allowing for a more translucent, lacy edge when the batter hits the hot ceramic or non-stick surface.
Precision Tools for the French Crepe Master
To replicate the top-down macro shot of a perfect stack, you need the right equipment. A heavy-bottomed 10-inch non-stick skillet or a traditional carbon steel crepe pan is essential for even heat distribution.
A high-speed blender or a fine-mesh whisk is required to eliminate every single lump. For the visual “dusting,” a fine-mesh sieve is non-negotiable to achieve that even, snow-like coating of powdered sugar seen in our visual blueprint.
Finally, a thin offset spatula or a crepe turner is your best friend. This allows you to get under those delicate lacy edges without tearing the paper-thin body of the French crepes.
The Science of the Batter: Why You Must Rest Your Batter
The biggest mistake home cooks make with French crepes is rushing the process. When you whisk flour into liquid, you activate gluten. If you cook the batter immediately, your crepes will be rubbery and tough.
By letting the batter rest for at least 30 minutes at room temperature (or overnight in the fridge), the starch granules in the flour fully hydrate. This creates a silkier texture and allows the bubbles to settle, ensuring your crepes are smooth and “paper-thin” rather than full of air pockets.
If you’re hosting a full brunch spread, consider pairing these with protein-packed Greek yogurt waffles for variety while your crepe batter rests to perfection.
The Art of the Pour: Step-by-Step Instructions
Phase 1: Creating the Silk-Smooth Batter
In a blender, combine the milk, water, eggs, melted salted butter, sugar, vanilla, and salt. Pulse for 5 seconds until combined. Add the flour and blend on high for exactly 10 seconds.
Check the consistency; it should be the thickness of heavy cream. Pour the batter through a fine-mesh strainer into a bowl to ensure zero lumps. Cover and let rest for 30-60 minutes.
Phase 2: Calibrating the Heat for Leopard Spots
Heat your non-stick skillet over medium heat. You’ll know it’s ready when a drop of water dances and evaporates instantly. Lightly brush the pan with a small amount of salted butter.
The first crepe is often a “test” crepe—don’t be discouraged! It seasons the pan. Look for the faint smell of nutty butter; this is your cue that the temperature is right for those golden-brown mottled spots.
Phase 3: The Swirl and the Sizzle
Lift the pan off the heat and pour about ¼ cup (60ml) of batter into the center. Immediately tilt and swirl the pan in a circular motion so the batter coats the entire bottom in a paper-thin layer.
Return to the heat. Cook for 60-90 seconds. You are looking for specific visual cues: the edges will begin to brown and slightly curl away from the pan, looking lacy and delicate.
Phase 4: The Perfect Flip
Slide your thin spatula under the edge. The crepe should lift easily. Flip it in one confident motion. The “show side” should now reveal those beautiful golden-brown leopard spots from the caramelizing butter.
Cook the second side for only 30 seconds. It won’t be as spotted as the first, which is why we always fold the first side facing outward. Stack the finished French crepes on a plate and cover with a clean linen texture napkin to keep them warm and supple.
Expert Tips for Success
- Temperature Control: If your crepes are pale and greasy, your pan is too cold. If the batter sets before you can swirl it, the pan is too hot.
- The “Lacy” Secret: For those shattered, lacy edges, ensure your batter is thin. If it feels too thick after resting, whisk in one tablespoon of water.
- Butter Management: Don’t pour oil into the pan. Use a pastry brush or a paper towel to apply a micro-layer of salted butter between every second or third crepe.
- Stacking for Steam: Stacking the crepes as they come off the pan allows them to “steam” each other, which keeps them flexible and prevents them from drying out into crackers.
Flavor Pairings and Elegant Serving Suggestions
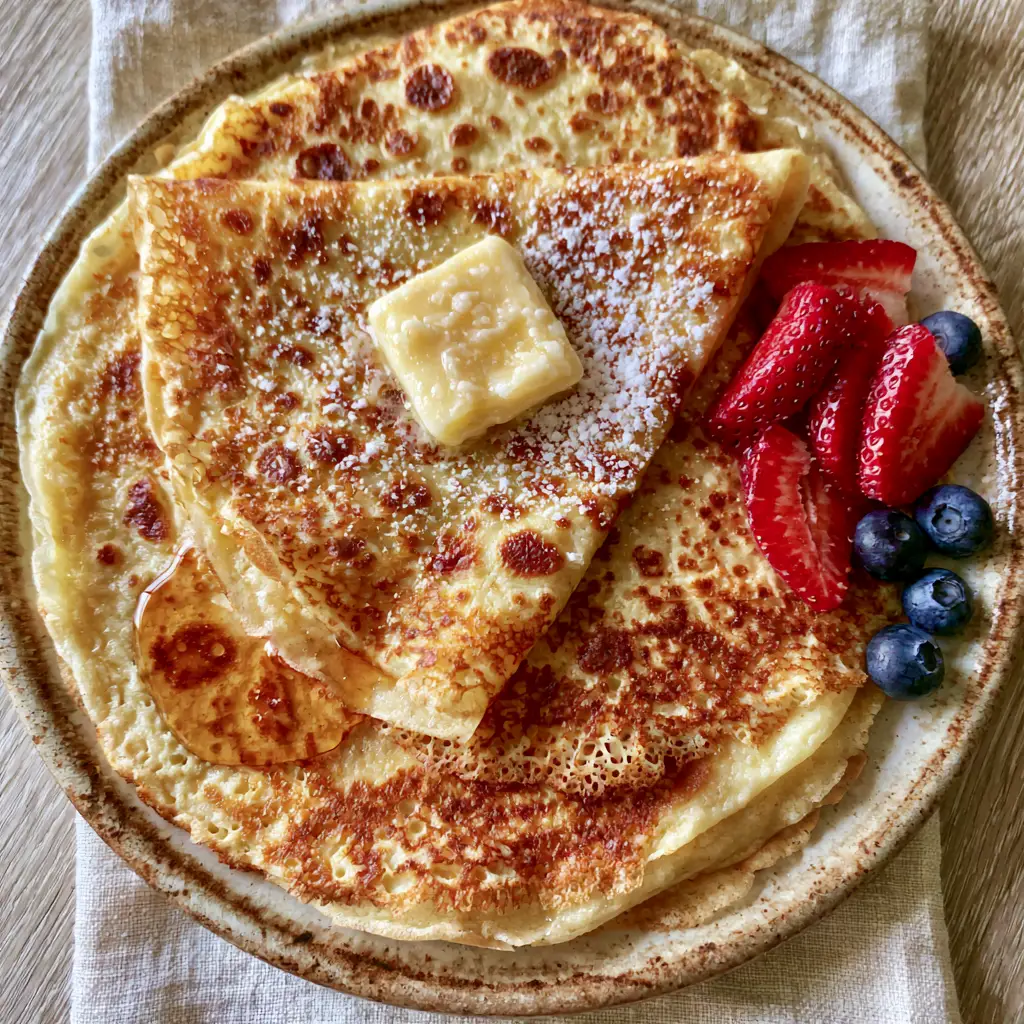
To achieve the look of our visual blueprint, place a stack of ten crepes on a ceramic plate. Fold the top crepe into a triangle or a loose “artful fold.” Place a small, precise square of cold salted butter on the warmest part so it begins to melt and glisten.
Use your sieve to create a light dusting of powdered sugar across the entire stack. Scatter vibrant red sliced strawberries and whole blueberries around the side. Finally, drizzle translucent amber maple syrup from a height, letting it catch the light.
For those seeking more morning inspiration, our raspberry lemon ricotta muffins offer a similarly bright flavor profile to round out your table. If you prefer a savory start, these French crepes can be filled with the same profile as our creamy spinach and eggs.
While these are light and delicate, sometimes you crave the crunch of golden butter waffles, which can be served alongside for a truly indulgent weekend feast. When planning a quick weeknight meal, remember that savory crepes fit perfectly into 30-minute vegetarian meal plans.
Storage, Reheating, and Freezing
French crepes are surprisingly durable. You can store the stack in an airtight container in the refrigerator for up to 3 days. To reheat, place them in a dry skillet over medium-low heat for 20 seconds per side until they regain their suppleness.
To freeze, place a piece of parchment paper between each crepe so they don’t stick. Wrap the entire stack in plastic wrap and then foil. They will stay fresh for up to 2 months. Thaw at room temperature for an hour before reheating.
Frequently Asked Questions
Yes, a blender is actually the preferred method! It ensures a completely lump-free, aerated batter. Just be sure to rest the batter afterward to let any air bubbles settle for a smooth finish.
Leopard spots come from a combination of a hot pan and using salted butter. The milk solids in the butter caramelize against the batter, creating the mottled pattern. Ensure your pan is medium-hot before pouring.
A dedicated carbon steel crepe pan or a high-quality 10-inch non-stick skillet is best. The shallow sides make it easier to flip the delicate, paper-thin edges without tearing them.
Rubbery crepes are usually caused by over-mixing the batter or failing to let it rest. Resting for 30-60 minutes allows the gluten to relax and the flour to fully hydrate, resulting in a delicate, melt-in-your-mouth texture.
The first crepe is essentially a ‘sacrificial’ crepe that seasons the pan and helps you calibrate the heat. Once the pan’s surface temperature and butter coating stabilize, the subsequent crepes will be perfect.
The Ultimate French Crepes Recipe Card
French crepes: The Ultimate Guide to Paper-Thin, Golden Leopard-Spotted Perfection
Ingredients
Equipment
Method
- Place milk, water, eggs, melted butter, sugar, vanilla, and salt in a blender. Pulse to combine, then add flour and blend on high for 10 seconds until perfectly smooth.
- Pour the batter through a fine-mesh strainer into a bowl. Cover and let it rest for at least 30-60 minutes at room temperature to allow gluten to relax.
- Heat a non-stick skillet over medium heat and lightly brush with salted butter. You want a faint sizzle but no smoking.
- Pour 1/4 cup of batter into the center while tilting the pan to spread it into a paper-thin circle. Cook for 60-90 seconds until edges are lacy and brown.
- Carefully flip the crepe and cook for another 30 seconds. Look for the distinctive golden-brown leopard spots on the first side.
- Stack 10 crepes on a plate. Fold the top one, add a pat of butter, dust with powdered sugar, scatter berries, and finish with a drizzle of maple syrup.
Notes
If the batter thickens too much during resting, whisk in 1 tablespoon of water.

Bring the Taste of Paris to Your Kitchen
Mastering French crepes is a gateway to a thousand different meals. From sweet morning stacks with maple syrup to savory dinner galettes, this paper-thin canvas is limited only by your imagination. The key is in the patience of the rest and the confidence of the swirl.
Did you manage to get those iconic leopard spots? We’d love to hear about your brunch success! Leave a comment below, and don’t forget to share your beautiful stacks with us on Pinterest. Happy cooking!